622.1 Introduction
Calendars are defined for the system and may be shared in various functions (i.e. reservations messaging, fine calculations, short term loans). These represent lists of dates and times on the system which may then be associated with specific parameters allowing the system to define which days the library is “open” for the relevant function.
The main part of the calendar allows you to specify up to 3 sets of opening/closing times for each day of the week. In addition you may define specific exceptional dates with different opening / closing times.
Opening and closing times may change over the course of a year. You may therefore specify ranges of dates between which the associated opening times are applicable.
After choosing this option a menu will be displayed:

Notes
You use the Calendar definitions option to set up and maintain required calendars on the system; the Holidays menu option allows you to define specific holiday periods separately from the main calendars, but which can be tied in with the calendars later on.
When you leave AFO622, the system “compiles” the information entered to generate a list of opening times for each location covered by the calendars. Two things should be noted – firstly, there may be some delay on exiting the function and secondly, that any changes will NOT be recognised by the system until you DO exit the function (and the data is compiled).
622.2 Calendar definitions
After choosing this option an overview screen will be displayed with codes already defined:
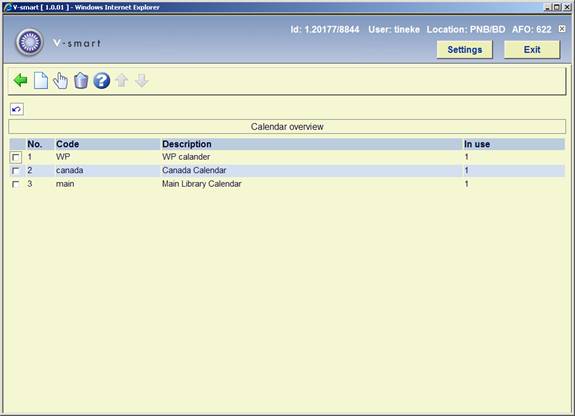
The displays list a code, a description and a flag set to 0 or 1 to indicate whether this calendar is available for selection for use in reservations messaging or elsewhere.
Options on the screen
: Choose this option to define a new calendar. See section 622.2.1 for further details.
: Select a code and choose this option to modify the calendar. See section 622.2.2 for more details.
: Select a code and choose this option to delete the calendar.
622.2.1 New calendar
: Choose this option to define a new calendar. After choosing this option the following form will be displayed:
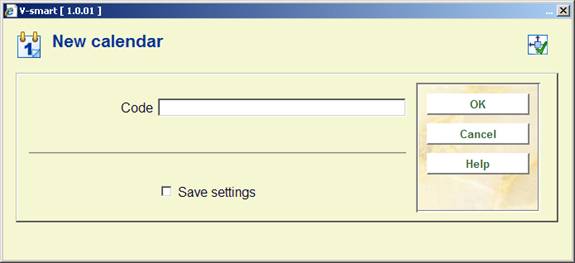
Enter a code and click a new form will be displayed:
Note
The code may not contain a slash (/).

Fields on the screen
Description: enter a brief description.
Notes: optionally add some more notes.
Holidays code: select a code from the dropdown list.
In use: check this box when the calendar may be used.
Number of weeks in a calendar: This allows you to specify the number of weeks to be defined by this calendar (1-12).
For example, 2 week calendar where every second Monday is closed or extended hours every second Thursday.
622.2.2 View/modify calendar
: Select a code and choose this option to modify the calendar After choosing this option an overview screen will be displayed with dates already defined for this calendar:

Options on the screen
: Select a code and choose this option to modify the calendar. After choosing this option the following form will be displayed:

After choosing the dates you will be presented with an overview screen listing the days of the week:
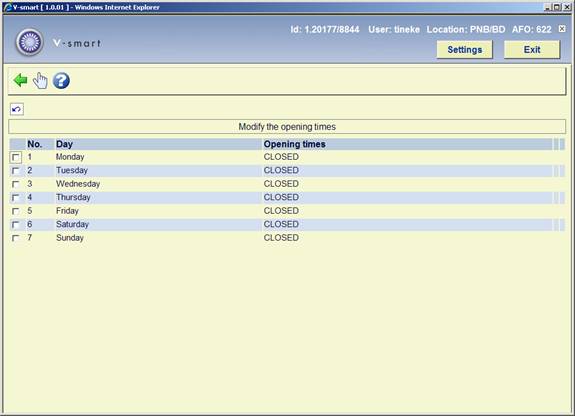
As can be seen, by default the system treats each day as closed and you may enter specific opening times by selecting a line to enter opening times on the following form.

Times should be entered in the form hh:mm (hours and minutes) using a 24 hour clock format.
: Select a code and choose this option to change the period.
: Select a code and choose this option to delete the dates.
: Select a code and choose this option to create a new calendar based on the details of the selected code.
: Select a period and choose this option to modify the opening hours for each day of the week.
: Choose this option to define exception days for the whole calendar. These are the days outside the normal opening days and times. On the overview screen you have the option to , and .

: With this option you can modify description, notes, holidays code and in use.
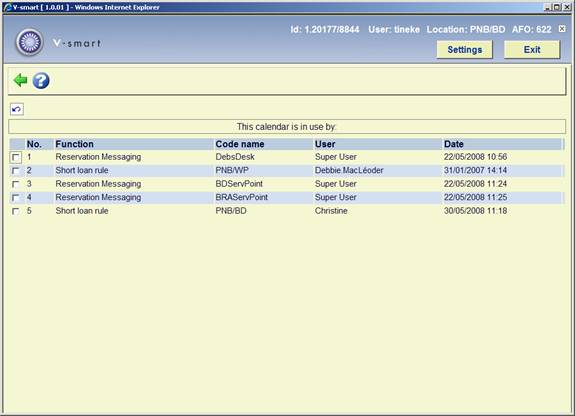
: This option displays the parameters for which the selected calendar has been used. The specifics of the display here depend on the function (e.g. Reservations Messaging) which sets up the relevant information, but typically you would expect to see a description of the function, some code (relevant to the function) and a user name and date on which the calendar was selected.
622.3 Holidays
Unlike exception dates (generally used to modify standard opening and close times), holidays are deemed to be closed for the entire day.
There may be more than one independent list of holidays.
After choosing this option an overview screen will be displayed with codes already defined:

Options on the screen
: Choose this option to define a new code. See section 622.3.1 for further details.
: Select a code and choose this option to add or delete a holiday date. See section 622.3.1 for further details.
: Select a code and choose this option to delete the code.
: Select a code and choose this option to modify the general details of the holiday code (code, description and in use).
622.3.1 New holiday code
: Choose this option to define a new holiday code. After choosing this option the following form will be displayed:

Fields on the screen
Code: enter the new code.
Description: enter a brief description.
In use: check this box when the calendar may be used.
After adding the code you have to select it again on the overview screen to add the dates. See section 622.3.2.
622.3.2 Dates
: Select a code and choose this option to add or delete a holiday date. After choosing this option the following form will be displayed:

Options on the screen
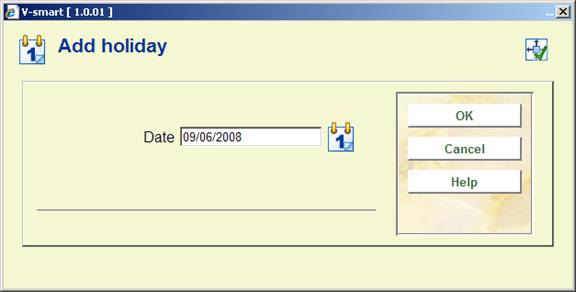
: Select this option to add a new date. You can choose a date from the calendar on screen:
: Select a date and choose this option to delete the date. The system will ask for confirmation.